Menu
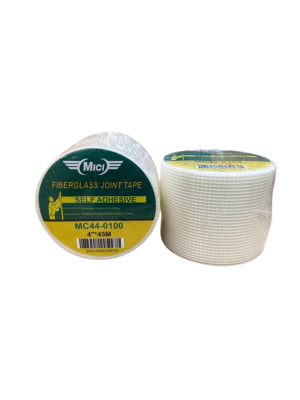
MICI Fiberglass Joint Tape
Starting From RM XX
Used in drywall installations to reinforce seams and joints. It’s made from woven fiberglass strands that are coated with an adhesive.
Details
- The tape provides strength and flexibility, making it ideal for preventing cracks from forming as the drywall settles.
- It is resistant to moisture, which is particularly useful for areas with high humidity (e.g., bathrooms).
How to use
-
Prepare the Surface:
- Before applying MICI fiberglass tape, ensure the drywall seams are clean and smooth. If you’re working with freshly installed drywall, apply a layer of joint compound to the seams first.
-
Cut the Tape to Length:
- Measure the length of the joint or seam you want to tape. Use a utility knife or scissors to cut the fiberglass tape to the appropriate length.
-
Apply the Tape:
- Peel off the protective backing from the adhesive side of the fiberglass tape.
- Press the tape gently onto the drywall seam, ensuring it adheres well. The tape should be centered on the joint.
-
Embed the Tape in Joint Compound:
- Apply a thin coat of joint compound (also known as mud) over the fiberglass tape. Use a drywall knife or trowel to smooth it out, ensuring the tape is fully covered and embedded. Make sure the compound is spread evenly.
-
Smooth the Compound:
- Once the tape is covered with compound, smooth out the surface by scraping off excess compound. The goal is to have a smooth, even surface with no ridges or lumps.
-
Allow Drying:
- Let the compound dry completely. This can take several hours or overnight, depending on the thickness of the compound.
-
Apply Additional Coats of Joint Compound:
- After the first coat has dried, apply additional coats of joint compound to build up the surface. Typically, 2-3 coats are needed to ensure a smooth, even finish. After each coat, allow it to dry before sanding it lightly to remove any bumps or imperfections.
-
Sand and Finish:
- Once the final coat of compound has dried, sand the area smooth with a fine-grit sanding block or drywall sanding tool. Be gentle, as you don’t want to damage the tape or compound.
- Finish by wiping down the area with a damp cloth to remove dust, and then apply paint or finish as desired.
Additional information
| Sizes | 1L |
|---|
key information

-
Details
-
How To Use
-
Available Colours
Available Colours
Lorem ipsum dolor sit amet, consectetuer adipiscing elit, sed diam nonummy nibh euismod tincidunt ut laoreet dolore magna aliquam erat volutpat. Ut wisi enim ad minim veniam, quis nostrud exerci tation ulla
How To Use
Lorem ipsum dolor sit amet, consectetuer adipiscing elit, sed diam nonummy nibh euismod tincidunt ut laoreet dolore magna aliquam erat volutpat. Ut wisi enim ad minim veniam, quis nostrud exerci tation ulla
Available Colours
Lorem ipsum dolor sit amet, consectetuer adipiscing elit, sed diam nonummy nibh euismod tincidunt ut laoreet dolore magna aliquam erat volutpat. Ut wisi enim ad minim veniam, quis nostrud exerci tation ulla